ArcadeCab
12/25/2012
 Merry
Christmas!
Merry
Christmas!
From our family to yours, Merry Christmas and happy holidays.
12/1/2012
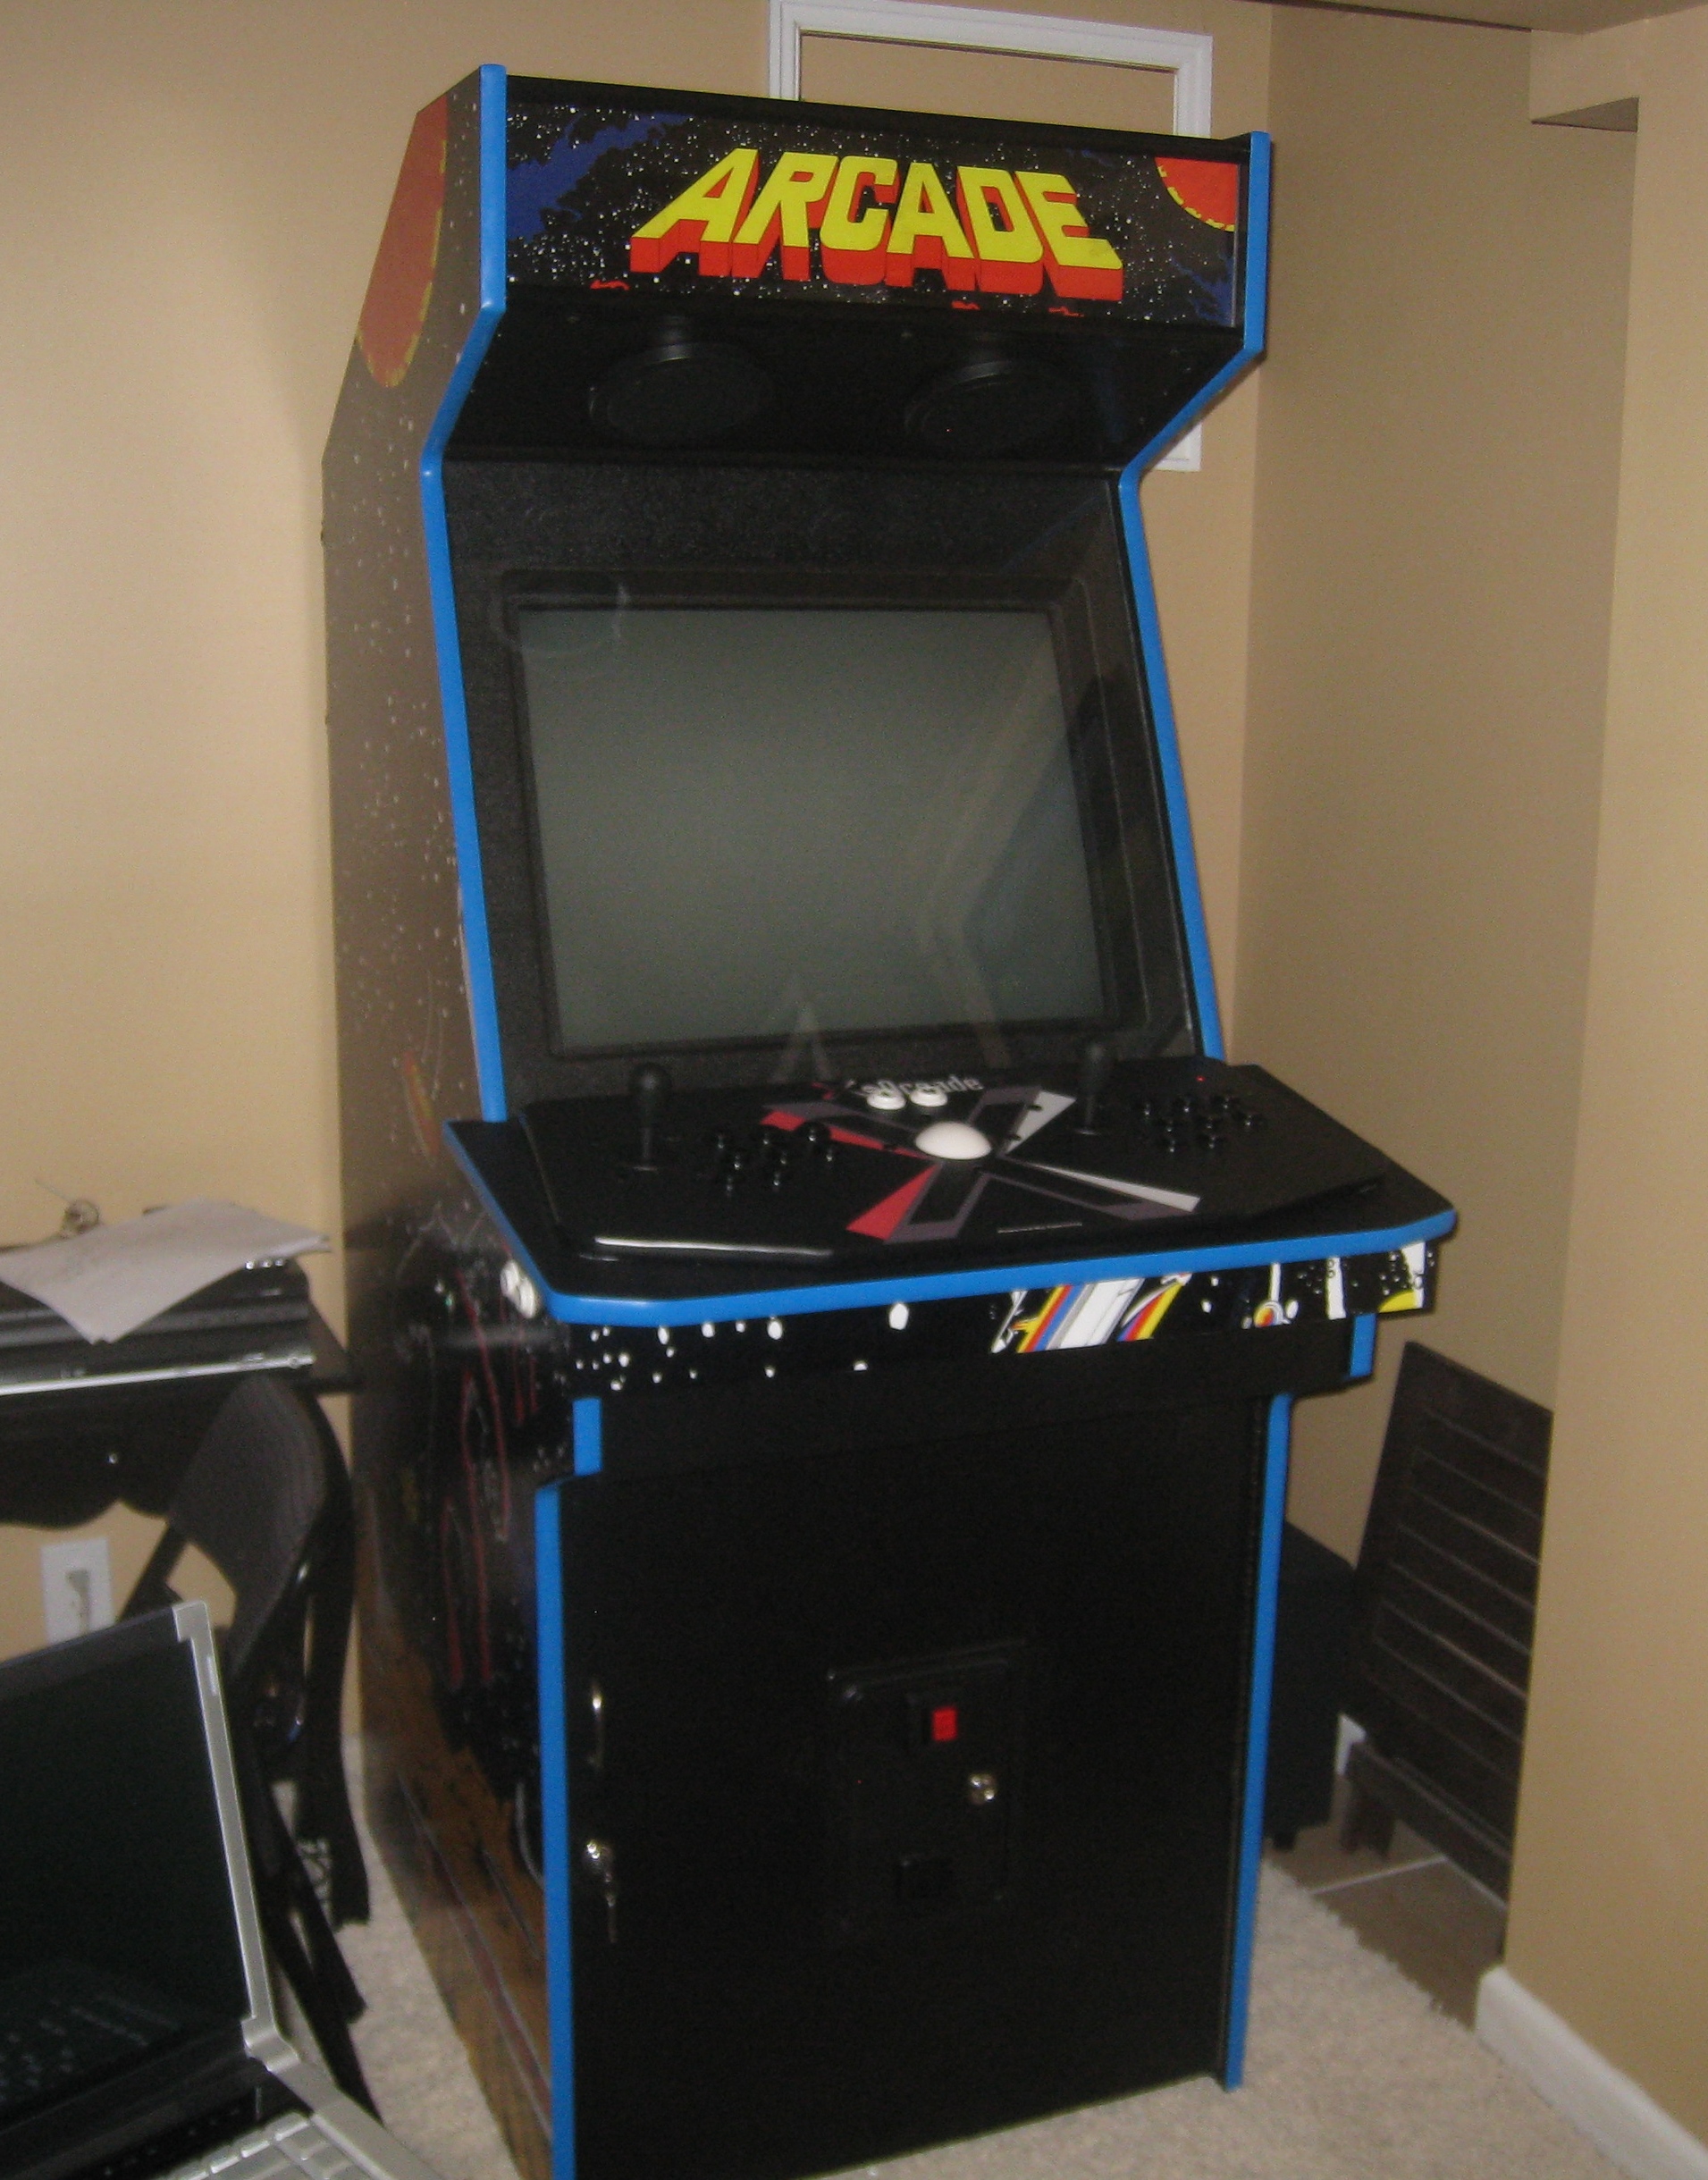
 Dave's
"NAF"
Dave's
"NAF"
Dave D sent me a great email detailing his cabinet he finished a couple
months ago and has been enjoying ever since. From his email (which
I left almost entirely intact):
"I used your guide and built an arcade for myself. It's awesome and,
as I'm sure you know for yourself, the source of vicious envy in the
most satisfying way possible. I went for a totally retro / Tron-like
style that's reminiscent of the NES and its accessories. Since it was
finished sometime in August it's provided hours upon hours of fun for my
friends and myself.
Some notable things about my build:
- Instead of installing a florescent bulb in the marquee, I actually
purchased a set of $2 USB keyboard LED strip lights off Amazon.com and
mounted them on a board. So instead of having their own plug or switch,
they reach my PC's USB port via 6' USB extension cords and conveniently
turn off as soon as the PC is. Plus they are bright enough to be visible
in a lit room.
- Instead of full-sized prints on the surfaces of the arcade, the
graphics are made of vinyl cut on a plotter and applied directly to the
painted arcade. I work in a sign shop and have access to precision
plotters that can slice out beautiful stickers from vector files, to any
size & shape as well as a variety of colors.
- Instead of using default MameWAH interfaces splashed with clipart of
consoles & games, I customized the interface to instead look like a
monochromatic, pixellated menu system like you'd find in an Atari,
complete with a rainbow-colored intro screen. The wallpaper of Windows,
albeit shown very briefly, displays a mock "LOADING CONSOLE / RAM / DIP
CHECK" diagnostic screen. It adds a retro feel to the entire machine,
even when it's just booting.
- I changed the Windows Logon sound to an 8-bit melody I composed with a
synthesizer, which gives the effect that something very old but very fun
is being activated.
- I installed a subwoofer in the base of the arcade in addition to the
speakers up top. Older arcade games obviously are not surround sound,
but the bass tunes of something like Donkey Kong make a very
intimidating rumble.
- I installed a wireless card and enabled file sharing on the cabinet.
This way I can add ROMs from my personal computer without even touching
the arcade.
I just wanted to let you know that I'm yet another guy who always wanted
an arcade in his home but couldn't justify the cost of buying a cabinet
with just one game on it. Your project was unbelievably cheaper to
execute, allowed an infinite level of customization as well as the
innate ability to play every game you can throw at it, and provides an
unparalleled level of satisfaction after it's built and ready to rock.
So thanks."
And thanks for sharing the details. I'm sure you've given people some ideas for their own builds.
There are two more pictures on the
Visitor Page.
11/30/2012
 Jeff
O's
Arcade
Jeff
O's
Arcade
Jeff O constructed this cabinet.
9/30/2012
 Megatron
Arcade
Megatron
Arcade
Dustin S and his dad built this arcade. They used a 26" TV and
created a diamond plate front door for storage. From his email:
"We also modified the
system to accept DDR pads on the front panel and added a diamond plate
front door for storage .
Our front end is
Mala
and we are using the IPac chip
for controls. We can have 3 players at the same time using the middle
joystick, and we have rigged up an attachable fourth set of controls for
extra fun. We also had the advantage of my girlfriend, Chelsea, being an
art major student so she painted the art on the sides and designed the
Marquee. It was a lot more work than we realized, but was well worth it
at the end."
.
Our front end is
Mala
and we are using the IPac chip
for controls. We can have 3 players at the same time using the middle
joystick, and we have rigged up an attachable fourth set of controls for
extra fun. We also had the advantage of my girlfriend, Chelsea, being an
art major student so she painted the art on the sides and designed the
Marquee. It was a lot more work than we realized, but was well worth it
at the end."
I agree. Very nice work! There are more pictures on the Visitor Page.
8/26/2012
 ArcadeCab
sponsors soccer team
ArcadeCab
sponsors soccer team
The site sponsored the youth soccer team my two children are on this
year. It is the 5-6 year-old age group so there are a lot of
children in a group all fighting for the ball but they are beginning to
learn positions. We've had our first game already (a win!)
and everyone had a lot of fun. The kids did great. If anyone
from the league is stopping by for the first time, welcome, and enjoy
your visit. And thanks to all the other loyal visitors whose
traffic helped pay for this sponsorship.
7/29/2012
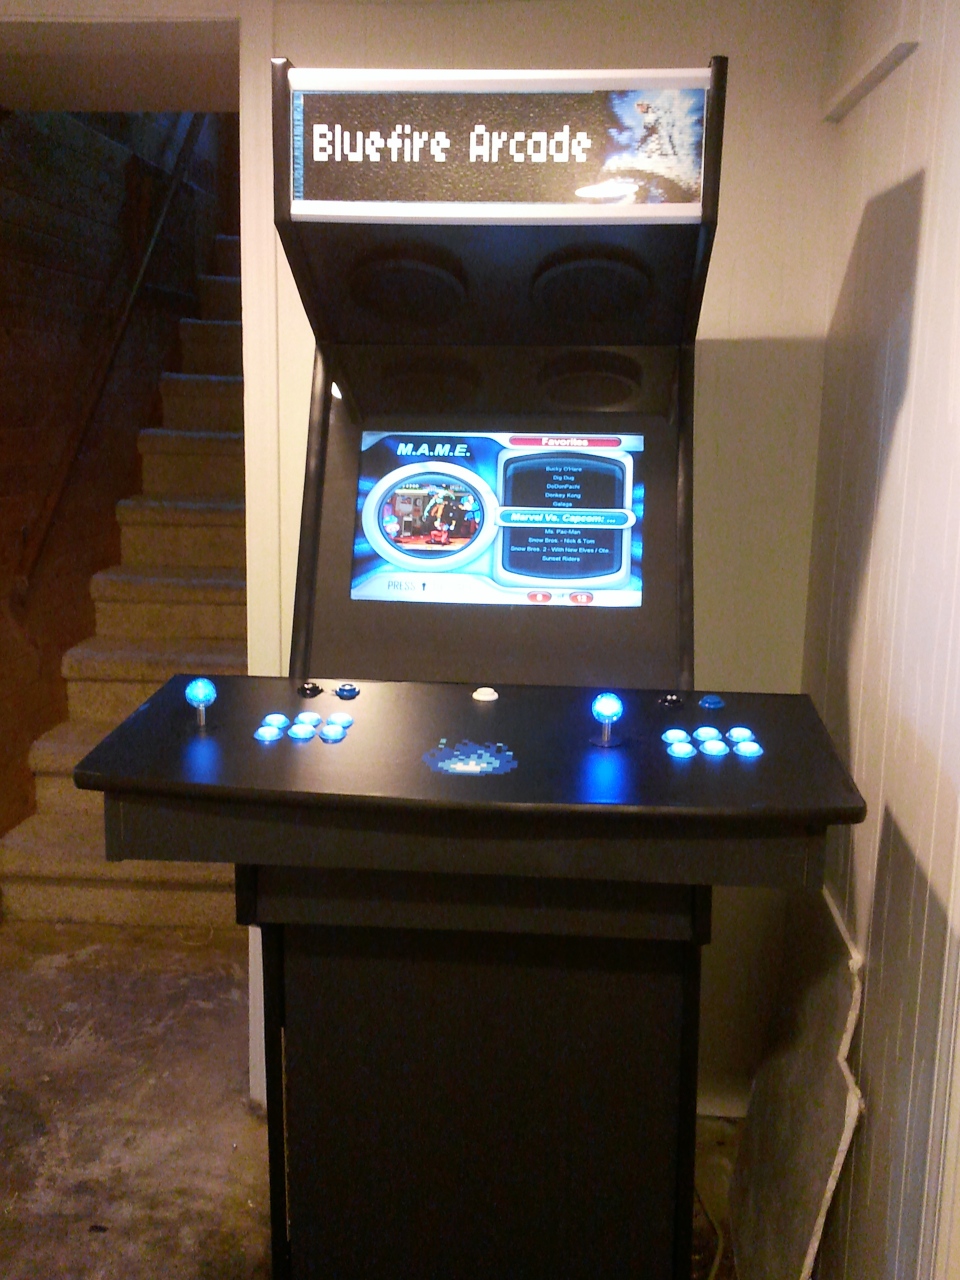 Bluefire
Arcade
Bluefire
Arcade
Ryan H sent me pictures of his Bluefire Arcade running
Mala. When selecting games the
buttons light up corresponding to the controls used in that particular
game (very cool!). He designed the
marquee himself, and "added some Godzilla art" that he pixelated to
match the rest of the machine. He said the art is from some old
8-bit sprites with some editing to tie everything together.
There are more pictures on the Visitor Page.
7/19/2012
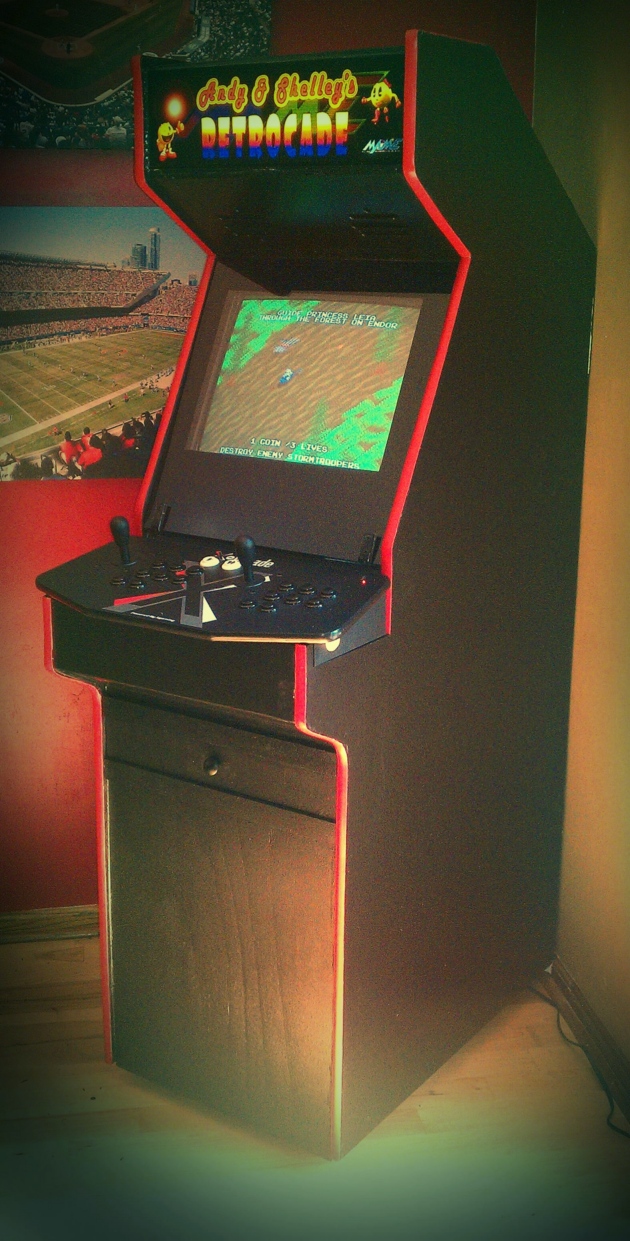 Andy and Shelley's Retrocade
Andy
W's arcade has taken a place of honor in his game room. It is driven by an old HP laptop (tucked away in the drawer) running
MAME32. He designed the marquee himself and had it printed "by those
great guys at EMDKAY.net".
7/2/2012
James V's arcade
James V sent me pictures of his almost completed cabinet. He used the
TankStick plans from the site but made a few modifications. James cut six
inches off the depth to reduce the "bulkiness' of the cabinet and added a
second drawer to accommodate his laptop in addition to keyboard and mouse.
He expanded the cabinet's width to 25-1/2 inches to allow for his 24"
Viewsonic LED monitor.
From his email:
"The monitor has two hdmi inputs. This makes it so I can run hdmi from the laptop, and also connect my Xbox 360 directly to the monitor. The monitor has an audio output jack which goes to a 150watt surround sound system. I have the two speakers up top, two mounted inside the cab, and the subwoofer. It rides on four swivel lock wheels for easy moving. In the top tray I house my Keyboard and Trackball, in the bottom tray I have all the hookups for my laptop. This way I can run the Cab as a Mame machine (Which I am running Maximus Arcade on), and also my main workstation. I have my Xbox360 and Dreamcast setup inside as well. And obviously I used the TankStick from Xgaming as my controller. Now I just need a nice coin door, and decide on side graphics. The last thing I will be doing is running green led strips in the speaker grills, the same strips under the cabinet itself, and switching out the buttons on the Tankstick for Blue Led ones for Player 1, and Green for Player 2."
6/10/2012
 Thierry's
Metric cab plans
Thierry's
Metric cab plans
Thierry lives in Quebec, Canada, and had a need for the
cabinet plans converted to metric. I did not have any conversion
available so he made some for himself, and graciously has
shared them with
you. They are based on the
second set of plans,
with a couple minor tweaks. It is built to hold the
TankStick and a 19" Viewsonic CRT.
I greatly appreciate Thierry allowing me to post these plans. Beginners can use all the resources they can get. PDF, DWG and JPG formats have been provided. Thanks again, Thierry!
5/26/2012
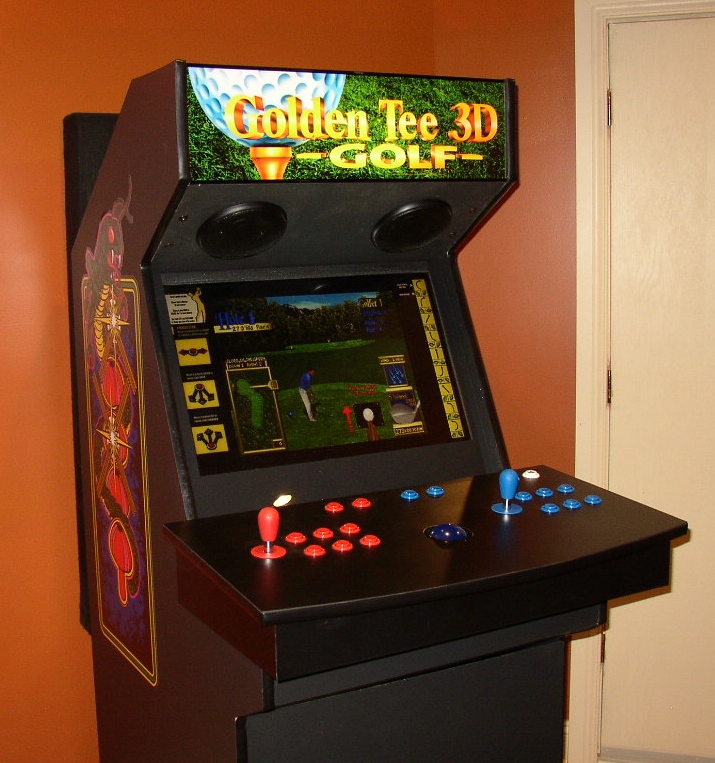 Wayne's
Golden Tee 3D
Wayne's
Golden Tee 3D
Wayne sent me an email describing his first arcade project.
Golden Tee was always a favorite of mine to play on my cabinet (along with
the Tiger Woods Golf series) so I can certainly appreciate how exciting it
is to play at home.
From his email:
"I completed my cabinet about 3 months ago. It is the hit of every party! Thanks so much for the site and plans. I don’t think I would have ever built the cabinet without them. I believe the cabinet had already paid for itself in Golden Tee savings alone! I’m looking forward to building another cabinet. Plus this would give me an excuse to use my new router! I didn’t build in a keyboard drawer but I’m half wishing I did now. The next cabinet will have to be kicked up a notch with some killer graphics. I just wanted to get this one done and start gaming!
The cabinet is 26 inches wide and houses a 28 inch LCD monitor. I used ¾ MDF and glued and air nailed the cabinet together from the inside. The control box is covered with black laminate from Home Depot. I used some crown bolts and insert nuts to make the speaker panel, top half of the back panel, and control panel removable. The T-molding was from T-molding.com. The cabinet has a standard Plexiglas bezel painted black on the back and is spaced off the monitor using ¾ weather striping. To hold the marquee in place I purchased a cheap ($9) poster frame. I cut the frame to 26 inches long along with several pieces of plexi that came with it. I sandwiched the marquee in between the plexi and used some clear tape on the back to hold it together. I have piano hinges on the control panel and front panel. I rolled on two coats of primer and black latex paint.
The trackball, buttons, Joysticks, coin door, and mini-PAC are from Ultimarc. I purchased the marquee from gameongrafix.com bargain bin for $5! The side art is also from gameongrafix.com. Jeff at Monstarcade hooked me up with the latest MAME ROMs. I’m running Hyperspin frontend on a new (demo unit) ASUS Windows 7 box. I had an older machine but it couldn’t run some of the newer games. The marquee light is an old florescent computer desk light put to good use. The cabinet has a Pyle Pro amp and a set of Pioneer car speakers which I picked up cheap on a closeout at Best Buy. I purchased some LEDs and resistors from Radio shack and used an old cell phone transformer to illuminate the trackball."
There are more pictures on the
Visitor Page.
2/10/2012
 Phil's arcade
Phil sent me these pictures of his finished project. The arcade houses
a massive
29" Makvision CRT Arcade Monitor with
bezel, and a TankStick.
He added artwork from
gameongrafix.com to the sides
and marquis. He built a customized enclosure around the TankStick to
handle the extra cabinet width required by the monitor. He
removed the bottom of the stick and extended the two fire buttons on either
side to the outside of the enclosure; all nicely done.
There is another picture on the
Visitor Page.