ArcadeCab
Cabinet Plans 2: Dado for the Base
Table of contents
- Background
- Tools
- Materials
- Cutting Side One
- Cutting Side Two
- Dado for the Base
- Building the Base
- Monitor Shelf
- Ledger Boards
- Speaker Area- Start
- Upper rear
- Back
- Top
- Drawer
- Door
- Speaker Area- Cuts
- Painting
- Assembly
- Marquee
- Monitor Bezel
- List of Boards
- Control Panel Part 1
- Control Panel Part 2
- Wiring the CP
- Attaching the CP
- Finishing Touches
- Software
- Final Thoughts

Dado for the Base
I used a different
construction technique for the base this time around than on previous
builds. The key reason is that I did not want any screw holes on the
exterior of the cabinet. The solution to this was to create slots on
either side for the base to sit inside. I used that technique in the
past for my entertainment center. The slot is cut 3/8" deep, which is
half the plywood thickness. Trust me- this is very sturdy. Below
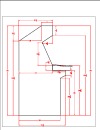
is the diagram of how it will work.

Before I begin detailing how I created this slot, let me explain the
calculations in general. The base will be inset 1-1/4" from the front
(1/2" inset + 3/4" for the door), and 1/2" from the back. The lower half
of the back
is open so we have just the inset. If you want to enclose the back of
the cabinet, just add the 3/4" for the backing board to the 1/2". The
base needs to be raised some to allow for both the casters and the 3/4"
ply strips that the casters will screw into. (The base construction is
detailed on the next page.) I measured the casters at 2-5/8". From my
current cabinet, I know that 3/4" of caster sticking out below the
cabinet is about perfect for carpet. The cabinet sides appear to be
floating just above the carpet, which is a nice look. You might drop
this to 1/2" if you plan to have it on a hardwood floor, but all my calcs assume a 3/4" exposure.
Knowing all these numbers, you can figure out where the top
of the slot should be. The simple math is below:
| 3/4" | Base plywood sheet | |
| +3/4" | Ply strips the casters screw into | |
| +2-5/8" | Height of the casters | |
| -3/4" | Amount the casters will stick out from
the underside of the cabinet |
|
| --------- | ||
| 3-3/8" | How many inches from the bottom of the
cabinet the top of the slot will be (see picture A) |
Now let's begin showing this process step by step. First lay out
the first cabinet side so the front of the cabinet is to your left.
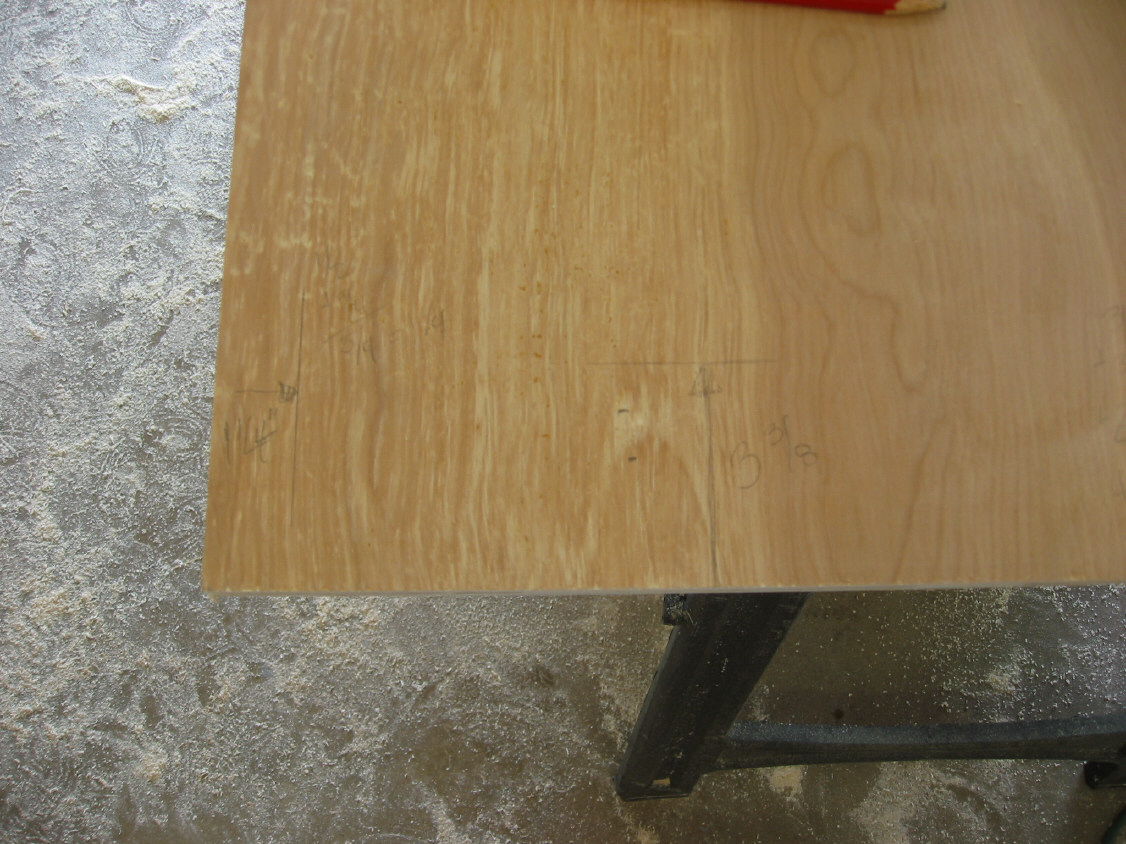
Next, measure and mark 1-1/4" from the front. That will be where
your slot will stop at. Next measure up 3-3/8" from the bottom and
draw a line across the side. That is the top of the slot.
Measure, and mark, 1/2" in from the back of the cabinet. That will
be the other stopping point.

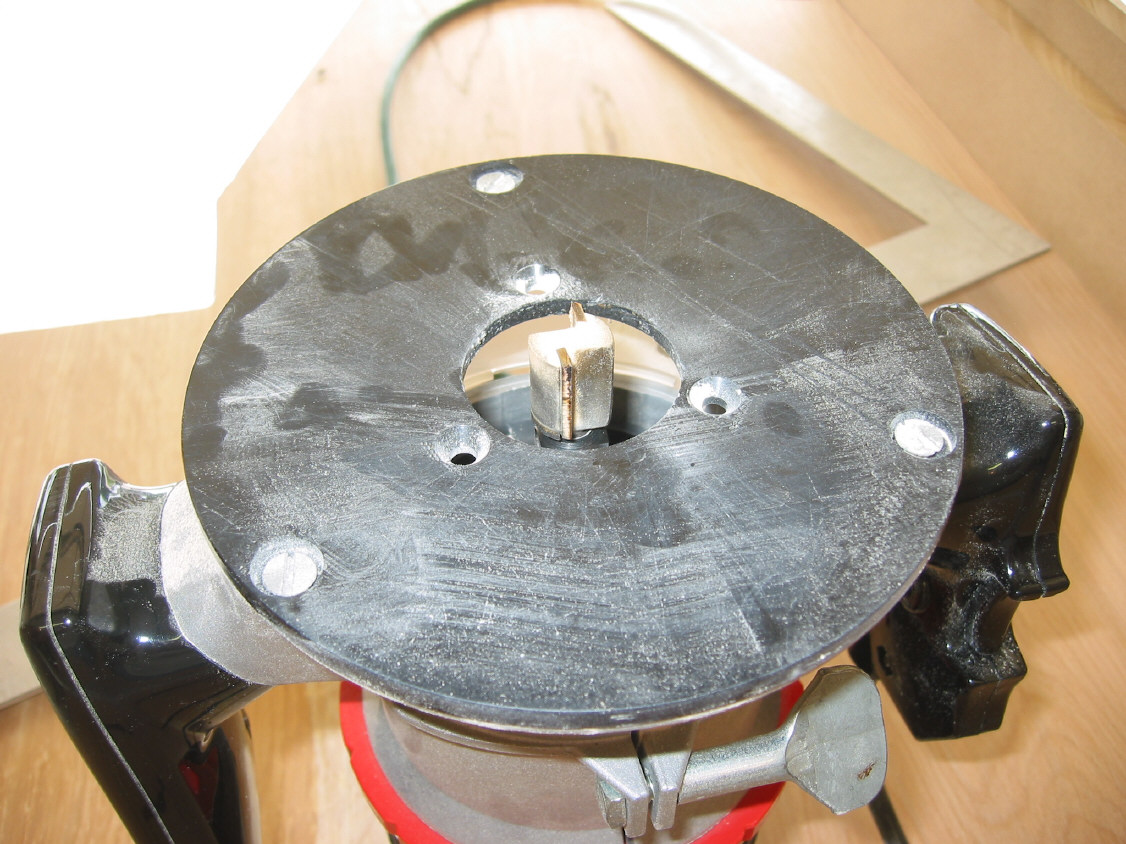
Load the 3/4" straight bit into the router (B). Measure the
distance from the edge of the bit to the edge of the router. This
number will be needed to offset your straightedge. Mine is
2-1/2". I add 2-1/2" to the 3-3/8" and arrive at 5-7/8".
This is where I will place the straight edge for the router to travel
along (see picture C). Clamp the straight edge down.
Next you will want to adjust the cutting depth of the router. Set it at 3/8". I always eyeball it by placing it on the edge of a ply sheet and seeing where the bit will actually cut to. Picture D shows this. When you get it adjusted perfectly, tighten the router down and plug it in. Time to cut the slot.
|
|
|
|
|


I started about an inch in from the left edge. I started the router up and slowly (keeping the router against the straightedge) brought it down into the wood. It'll take a second for the bit to chew through the wood. Once the router base is flat against the plywood side, slowly cut to the right. You might need to stop a couple times to clear all the dust from the slot- you are cutting a fair amount of wood here. Stop when the router bit reaches the right end line that you marked 1/2" from the backside. Then go back and cut to the far left line. What this will leave you with is a rounded bit on each side (see picture E). You'll want to square off the two ends to make the base fit in the slot nicely.
To make the ends nice and sharp, I use a 3/4" wood chisel but you could clean it up with simply a hammer and screwdriver. You just want the two ends squared off and not rounded as they are right now. This will only take a minute but when finished you'll end up with something like picture F shows.
Take this side off the saw horses, set careful to the side, and follow the same steps for the other side. Be careful to note which is the front and which is the back side when placing your stop lines.
|
|
|

