ArcadeCab
Cabinet Plans 2: Ledgers
Table of contents
- Background
- Tools
- Materials
- Cutting Side One
- Cutting Side Two
- Dado for the Base
- Building the Base
- Monitor Shelf
- Ledger Boards
- Speaker Area- Start
- Upper rear
- Back
- Top
- Drawer
- Door
- Speaker Area- Cuts
- Painting
- Assembly
- Marquee
- Monitor Bezel
- List of Boards
- Control Panel Part 1
- Control Panel Part 2
- Wiring the CP
- Attaching the CP
- Finishing Touches
- Software
- Final Thoughts

The Ledgers
We have already installed
the ledger supports for the monitor shelf. Now we add the
remaining ledgers that will hold the cabinet togeth er. The ledger
design is such that all the screws will be installed from the inside of
the cabinet, with no external screw holes to patch. It also makes
disassembly of the cabinet easy. This was important for us and
will allow Scott to paint the cabinet pieces while they are laid out
flat, which
is far easier than when the cabinet is completely assembled.
er. The ledger
design is such that all the screws will be installed from the inside of
the cabinet, with no external screw holes to patch. It also makes
disassembly of the cabinet easy. This was important for us and
will allow Scott to paint the cabinet pieces while they are laid out
flat, which
is far easier than when the cabinet is completely assembled.
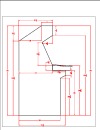
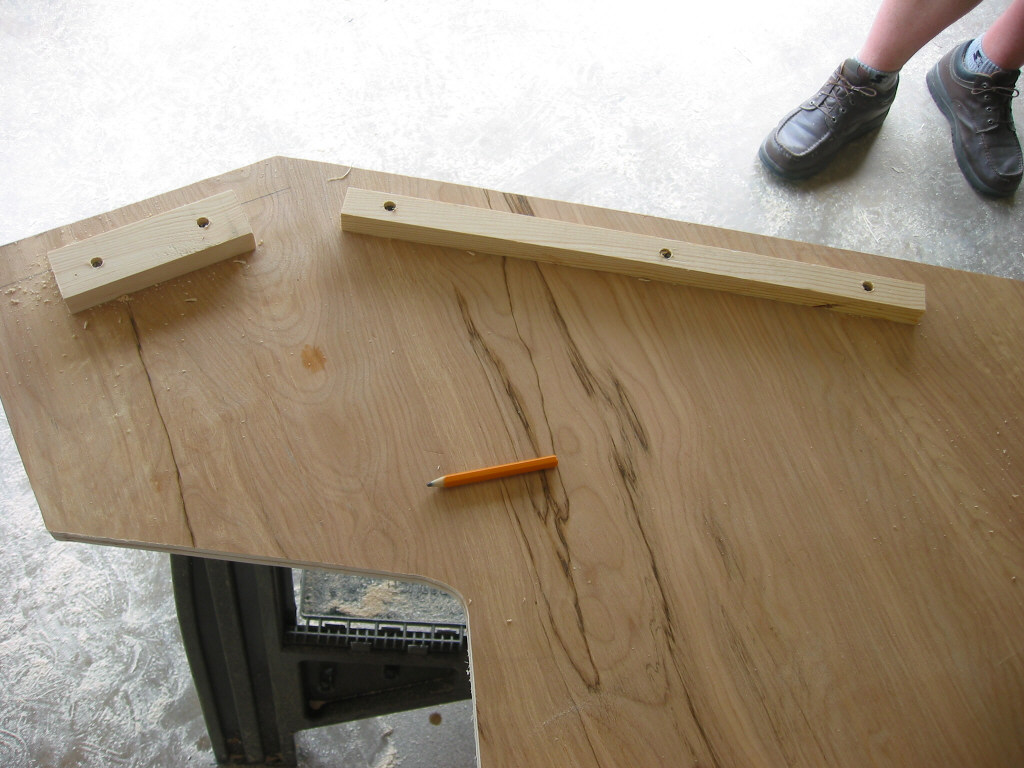
To make your life easier, lay one cabinet side down on two saw horses. You might want to refer to the picture to the right for all the ledger measurements I refer to.
The ledger for the base
Using the 1x2 board, cut two 31" strips. Before attaching to the
side, countersink/pre-drill four holes in the top side to receive the
screws that will hold the base in place. Then align the bottom of
board with the top of the dado (slot) and attach it to the cabinet side.
The ledger for the top
Using the 1x2 stock, cut two 5"
strips. Locate the top of the strip 1-1/4" down from the top of
the cabinet side. This allows a 1/2" inset once in factor in the
3/4" top board. Countersink and attach this board.
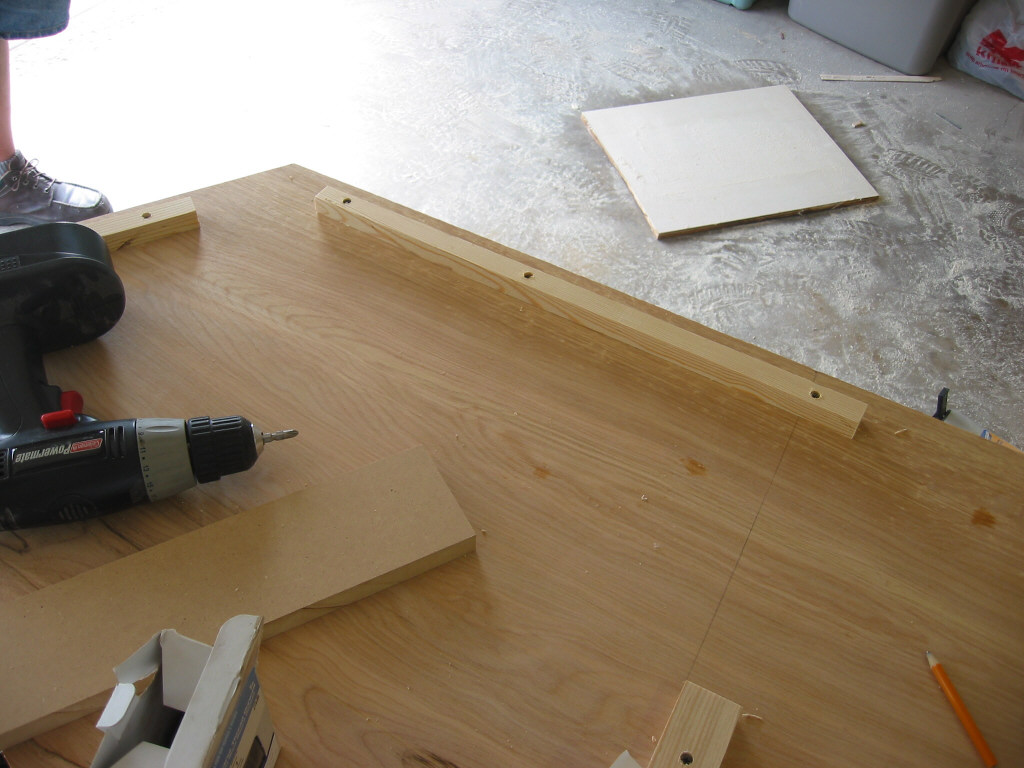
The monitor bezel ledger
The ledger strips (16" long in the
above picture) are recessed differently than the others. I like to
have a 1/2" recess for the glass to sit in front of the monitor.
This combined with the 1/4" thickness of the eventual glass panel means
you will recess these boards 3/4" total (1/2" + 1/4" = 3/4").
These strips could also be of smaller stock than the rest as they serve
only to keep the glass from falling back into the cabinet, and only need
to be screwed into from one face.
The remaining ledgers
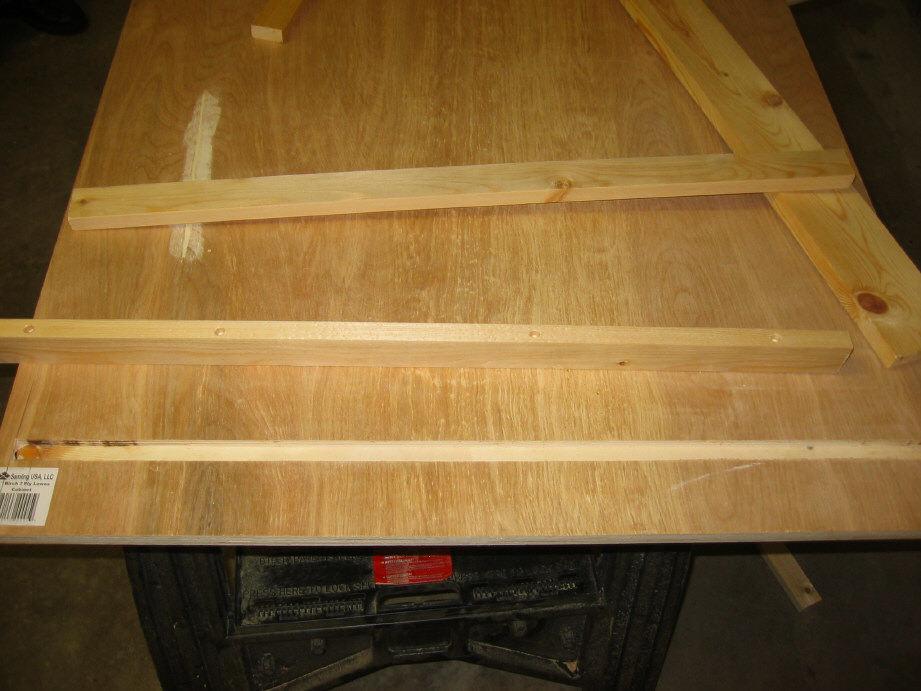
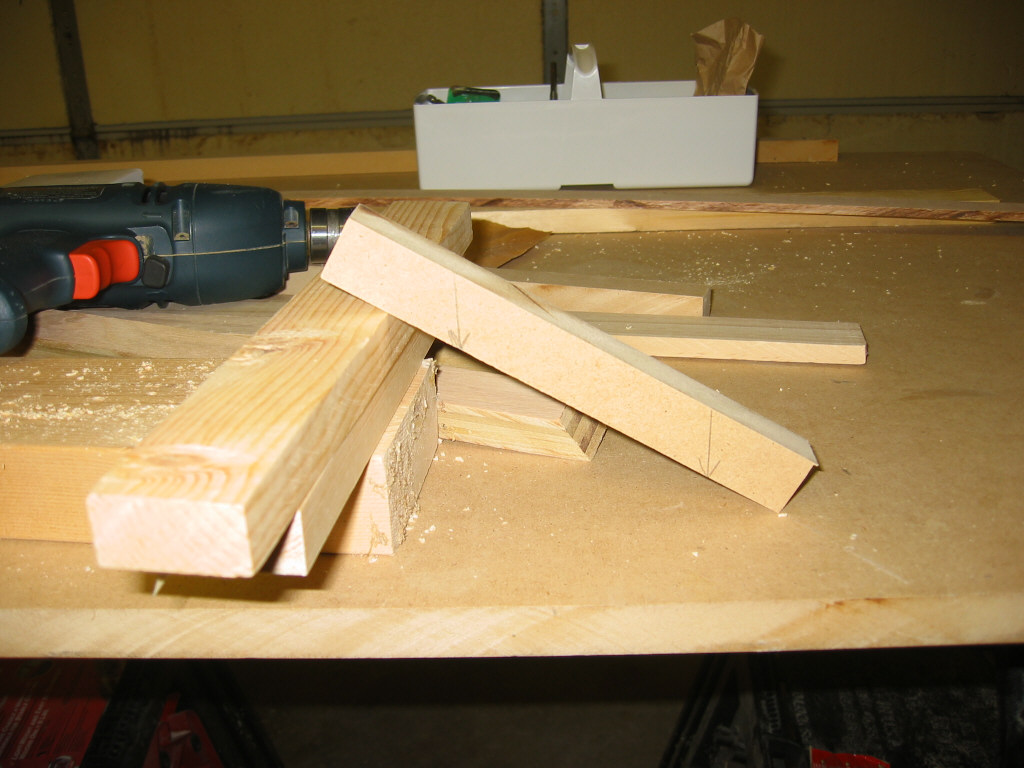
For the rest of the ledgers, I took a
piece of 1x4" stock 4' long and cut two strips 1" wide using the table
saw. This allows us to use 1-1/4" screws that, when countersunk a
bit, will hold the cabinet panels very securely without fear of popping
a screw head through the exterior side.
For each of the remaining ledgers, I predrilled and countersunk the holes on the two sides (top and one side) before attaching to the cabinet. See pictures B and C for a visual description. Then I located each ledger 1-1/4" from the outside of the cabinet. By examining the picture at the top of this page, you can see what I cut each strip at. The only tricky part is the interior holes on the speaker area.
|
|
|
|
|

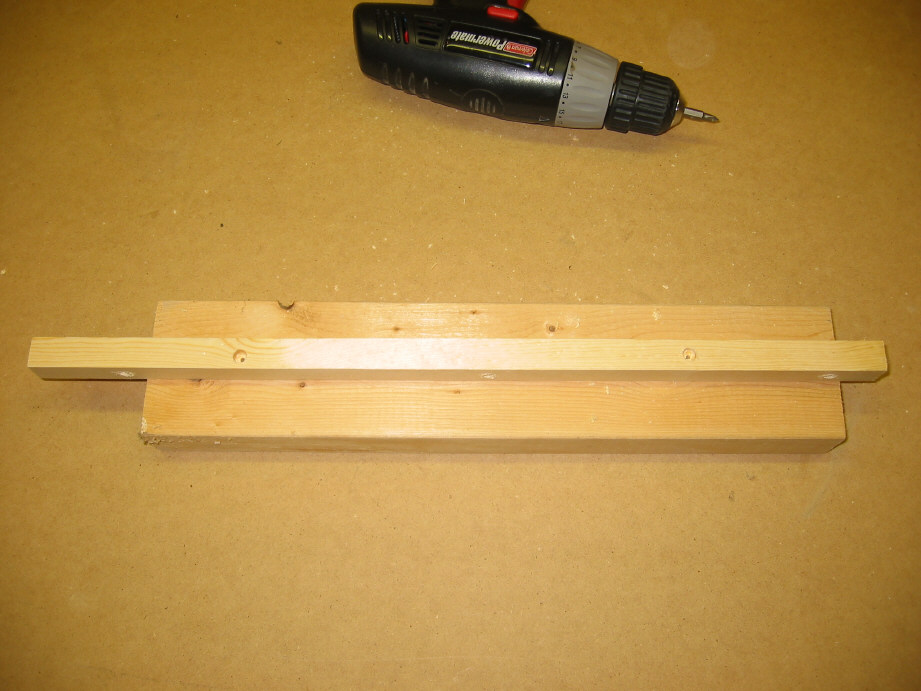
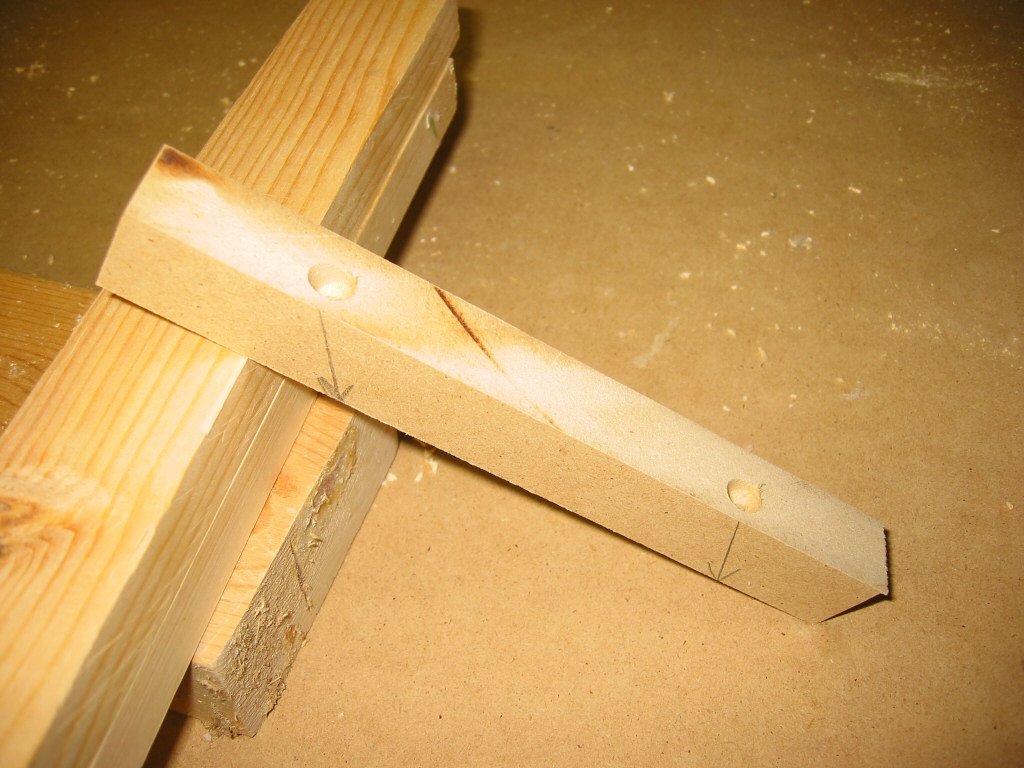
Because we will be drilling from the top of the
cabinet down, the holes in the speaker ledger will need to be angled.
See pictures G and H for how I achieved this. You'll see what I
mean when you start adding on the ledgers yourself. Other than
this bit, the rest is very straight forward.
|
|
|
|
|
Take the completed side off the saw horses, and replace with the other side. Repeat the above steps with this second side.
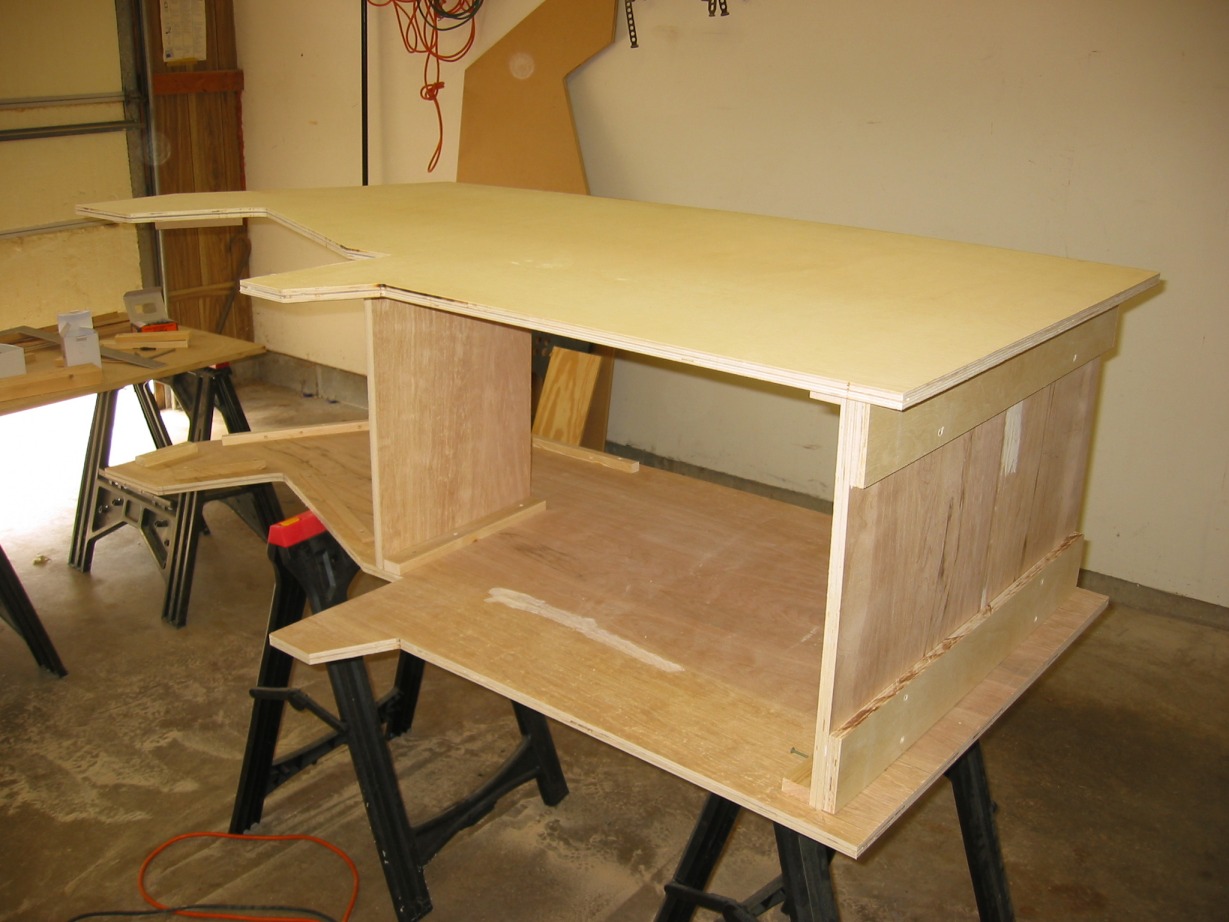
Now you can attach the base and monitor shelf.
Then stand the shell upright to prepare for the next series of
activities.