ArcadeCab
Cabinet Plans 2: Marquee
Table of contents
- Background
- Tools
- Materials
- Cutting Side One
- Cutting Side Two
- Dado for the Base
- Building the Base
- Monitor Shelf
- Ledger Boards
- Speaker Area- Start
- Upper rear
- Back
- Top
- Drawer
- Door
- Speaker Area- Cuts
- Painting
- Assembly
- Marquee
- Monitor Bezel
- List of Boards
- Control Panel Part 1
- Control Panel Part 2
- Wiring the CP
- Attaching the CP
- Finishing Touches
- Software
- Final Thoughts

Marquee
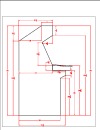
To start, take your marquee
retainer strip and cut two 19-7/8" strips. A hacksaw works great
(see A and B). Use a little 220 grit sandpaper to smooth the ends.
After that, you will need to cut two pieces of plexiglass which will be used to sandwich the marquee art. We used 19-7/8" x 7-1/2" as the size, which we arrived at by physically measuring the area it was to go into, and subtracting 1/4". Scott used a straightedge and X-acto knife to make these cuts (C). Take your time. The best method is to score one side by going over the line with your blade multiple times until you get about half-way through. Then place the waste end over the edge of the table, with the score line on the edge. With firm pressure, snap the plexi along that line. Be careful- the cut edges of plexi are extremely sharp.
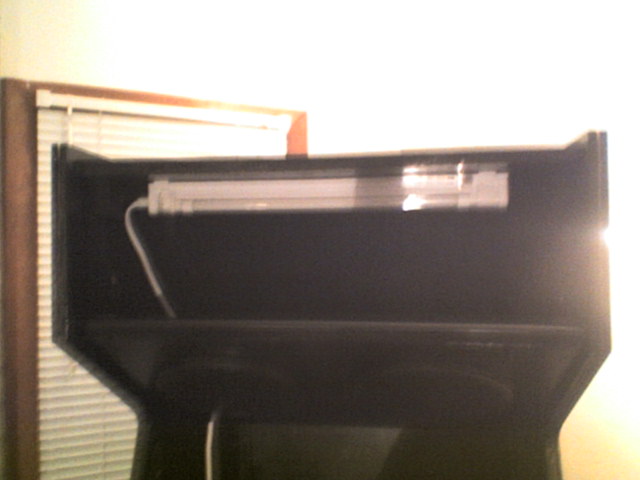
Next is time to attach the light to the underside of the cabinet's removable top. Just follow the directions that comes with your light, and make sure to both center the light left-to-right, and to face the light output to the front of the cabinet. Pretty straightforward (see D).
|
|
|
|
|


You can test the light by putting the board in place, and firing it up.
Now it is time to attach the two marquee
retainer strips to the cabinet. Take your first retainer strip and
place it on the top edge of the speaker board, the 'cup' facing up.
You'll want to leave about 1/4" of gap at the end to handle the plexi
pieces. Pre-drill two holes through the retainer and into the speaker
board, trying hard to make them symmetrical. Use two screws to attach
the retainer, preferably black. If you don't have black screws, a
Sharpie can work wonders for you after they are in place. Scott
used this method for the same screws as on the speaker grills.
Mount the other retainer strip to the (removable) top board using a
similar process. Just be sure to have the
'cup' facing down this time. Once you have finished this step, feel free
to test out your marquee. Just sandwich the art between the two pieces
of plexi (after Windexing them clean). With the top of the cabinet off,
put the bottom edge of the sandwich into the lower retainer. Then
carefully place the top board. It might take a bit of finagling to get
it in place but once it is, it won't be moving easily.
Stand back, flip on the light, and enjoy your handiwork.
