ArcadeCab
Cabinet Plans 2: Cutting the Speaker Holes
Table of contents
- Background
- Tools
- Materials
- Cutting Side One
- Cutting Side Two
- Dado for the Base
- Building the Base
- Monitor Shelf
- Ledger Boards
- Speaker Area- Start
- Upper rear
- Back
- Top
- Drawer
- Door
- Speaker Area- Cuts
- Painting
- Assembly
- Marquee
- Monitor Bezel
- List of Boards
- Control Panel Part 1
- Control Panel Part 2
- Wiring the CP
- Attaching the CP
- Finishing Touches
- Software
- Final Thoughts

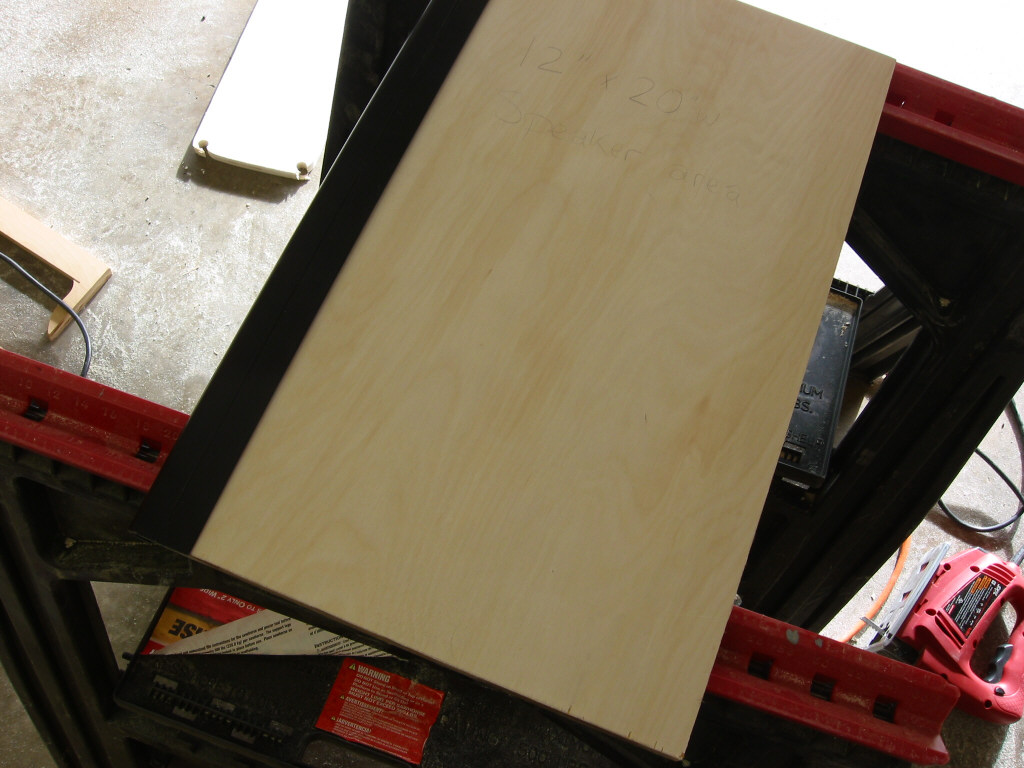
Cutting the speaker holes
Before we
move into the actual work, I want to point out how difficult it was for
Scott to find some "plain-Jane" speaker covers locally. With
everyone looking to "pimp their rides" I guess they are no longer
sellers. Scott stumbled upon a gentleman at Circuit City who, upon
hearing what the intended purpose was, let Scott poke through the box of
parts that were being disposed of in the course of stereo upgrades.
Scott found exactly what he was looking for, and the price could not be
beat. Thanks Doug.
Update 5/5/2013- Chris M found some nice ones at parts-express.com. The ones linked are 5-1/4". Thanks Chris.
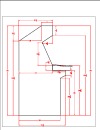
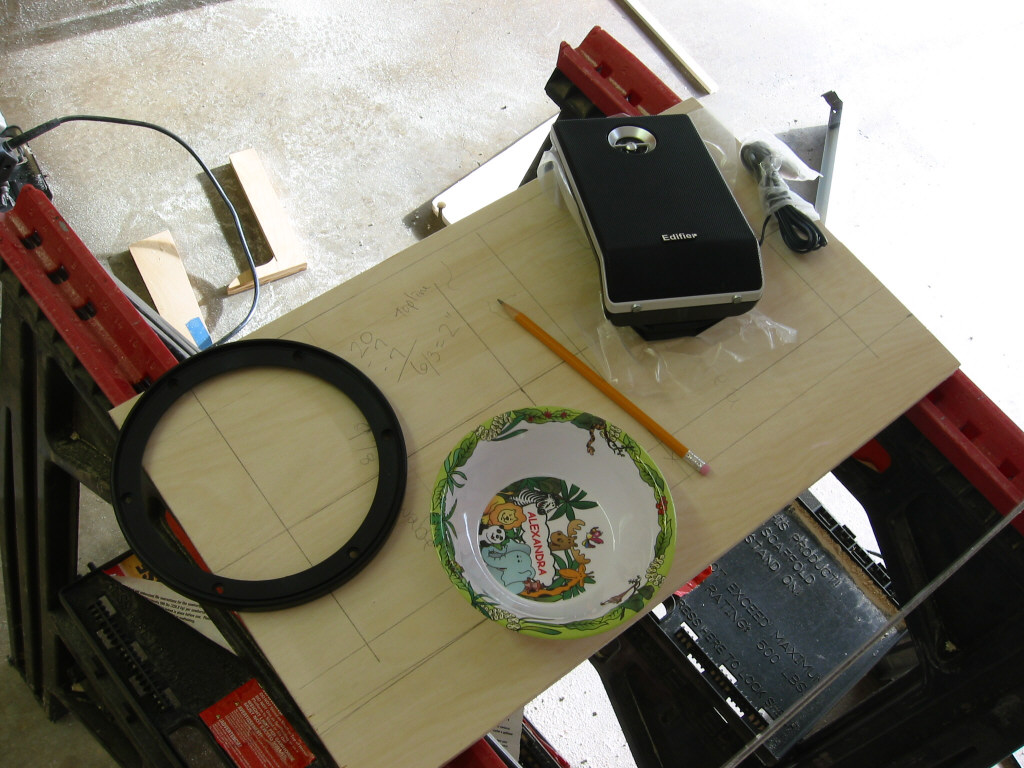
If you are using some other cutout design, then your measurements will differ but the general concept will be the same. As far as the circle is concerned, I hunted through the house for something that I could trace around that was the correct size. One of Alex's baby bowls ended up being the perfect size (see C).
The speaker holes should be centered front-to-back and side-to-side on the viewable portion of the board. Viewable is the key term here. Remember that a portion of the speaker board will be covered by the marquee retainer, and some will be hidden from view behind the monitor glass. To come to the viewable space, I placed the marquee retainer on the board about where it would be located permanently. Then I figured out where the board would begin to hide behind the monitor glass by placing it in the cabinet and marking the point where the glass would meet it. For my situation, the resulting number was 9-1/8" viewable (see B). Your number should be very close to that.
After that, I set about centering the circles within this area. I won't try to explain what I did but suffice it to say the end result was the circles were drawn on the board.
|
|
|
|
|


Drill out a couple holes within your circles (as in E).
These will give you spots to drop the jigsaw blade down through.
Now, taking your time, cut out the two circles. When finished,
you'll have two nice circles (F). I have shown in pictures G and H
how the speaker grills will fit. The right side is just the grill
attachment, with the left showing the grill face in place. It will
be a lot less 'see-through' once it is on the cabinet.
|
|
|
|
|


Now the cabinet is ready to be sanded, primed, and
painted, so on to the next page.