ArcadeCab
Cabinet Plans 2: Monitor Shelf
Table of contents
- Background
- Tools
- Materials
- Cutting Side One
- Cutting Side Two
- Dado for the Base
- Building the Base
- Monitor Shelf
- Ledger Boards
- Speaker Area- Start
- Upper rear
- Back
- Top
- Drawer
- Door
- Speaker Area- Cuts
- Painting
- Assembly
- Marquee
- Monitor Bezel
- List of Boards
- Control Panel Part 1
- Control Panel Part 2
- Wiring the CP
- Attaching the CP
- Finishing Touches
- Software
- Final Thoughts

The Monitor Shelf
We used a flat panel (LCD)
monitor for this project so the measurements shown are specific to it.
The process is the same, though, for any monitor you choose to use.
The exact measurements might differ.
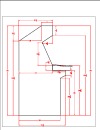
Start by cutting a plywood board 20" x 14-1/2" (see A), and two 1x2
ledger strips 14" long.
Measuring for placement
The easiest and most accurate method for locating the monitor shelf
requires your actual monitor. You'll need a second set of hands for this
step, preferably a pair you trust holding your expensive monitor. First,
measure the monitor screen from top-to-bottom. Now subtract that
number from 20-1/2", and divide by 2. This number is how much space will
be at the top and bottom of the monitor screen within the monitor area
of the cabinet. See the picture to the right to see where the
20-1/2" came from.
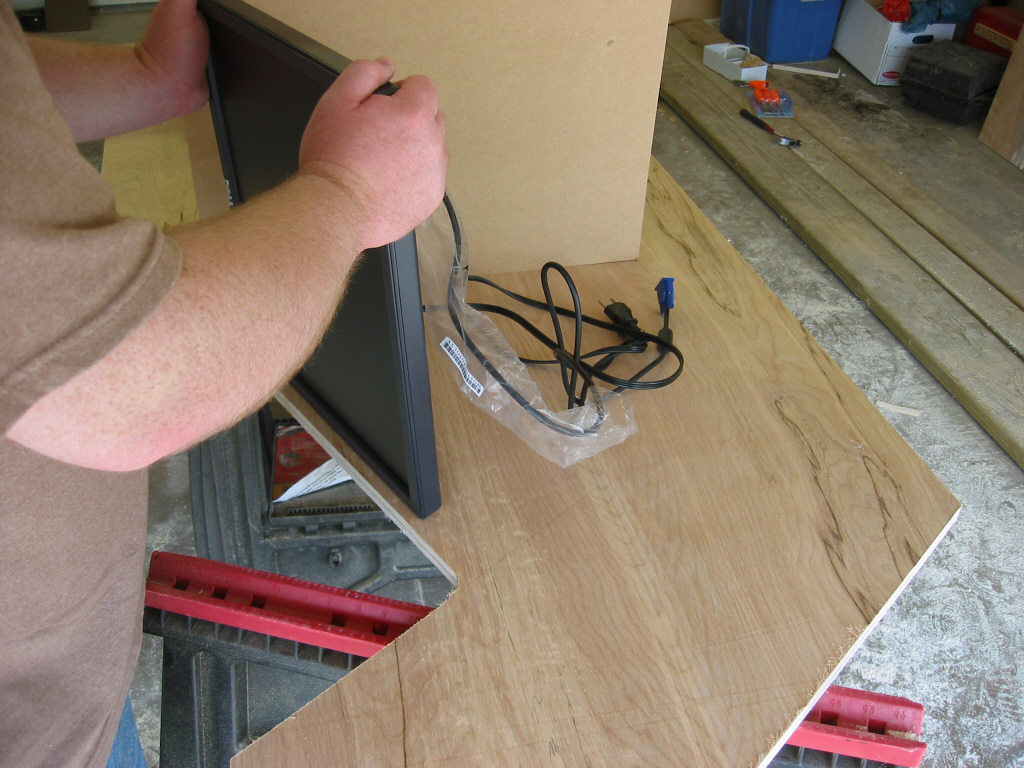
What we did was to hold the monitor in the correct location, with the monitor face at the same angle as the front of the cabinet. Using the number from the previous calculation, adjust the monitor so that it is this number of inches from both the top and bottom point (see picture above for the two points). See pictures B and C to see what I am talking about. I then placed the monitor shelf flush against the underside of the monitor's base, and drew a pencil line along its underside (see B and E for the pencil lines). This will be the top of the ledger board. By using the actual monitor in this process, you are guaranteed to have it be exactly correct when finished. Picture F shows how nicely the monitor is situated. Also notice how patient Scott is with my picture-taking.
|
|
|
|
|


Take one of the two ledger boards. Aligning it
with both the front of the cabinet and the pencil line, screw it in
place. As with all my holes, I used my combination
pilot/countersink bit to recess the screws. I used 1-1/4" screws
for this (see G).
|
|
|
|


In order to transfer the measurements to the other side,
I simply measured from the bottom of the side to the pencil line at both
the front and the back of the cabinet, and wrote these two measurements
down. Swapping the two sides, I measured, drew my line, and
attached the second ledger. Very quick and easy.
Next
up is the attachment of all the ledger boards.